
Yoga Trapeze has become a part of the daily fitness routine of countless people around the world is is, one of the best fitness tools of modern times. It is an important inversion tool that helps you experience the benefits of high intensity aerial Yoga moves. With this, you can exercise your whole body, and release the built up stress to free your mind, in a easy and fun way. Not only is it a good way of exercising, it is also a therapeutic tool to release the muscle tension. Working out with a trapeze is also good for your nervous system. These are just a few of the perks of working out with the trapeze, among many others.
How to set-up a Yoga Trapeze stand
You can setup the trapeze inside your house with hooks, or, with the help of a Yoga trapeze stand, you can choose the location. Whether it be your garden, backyard, or a park; you have the freedom to setup in a place of your liking. Setting up very simple and easy, and it does not take up a lot of space. Plus, they are not at all that heavy and can be easily transported from place to place. All in all, it us a safe and easier way of exercising.
Setting up a Yoga trapeze stand is fairly easy, and in this article, we’ll list the steps you need to follow. The process for different stands is fairly similar so you don’t need to worry about that much. So without further ado, let’s get started –
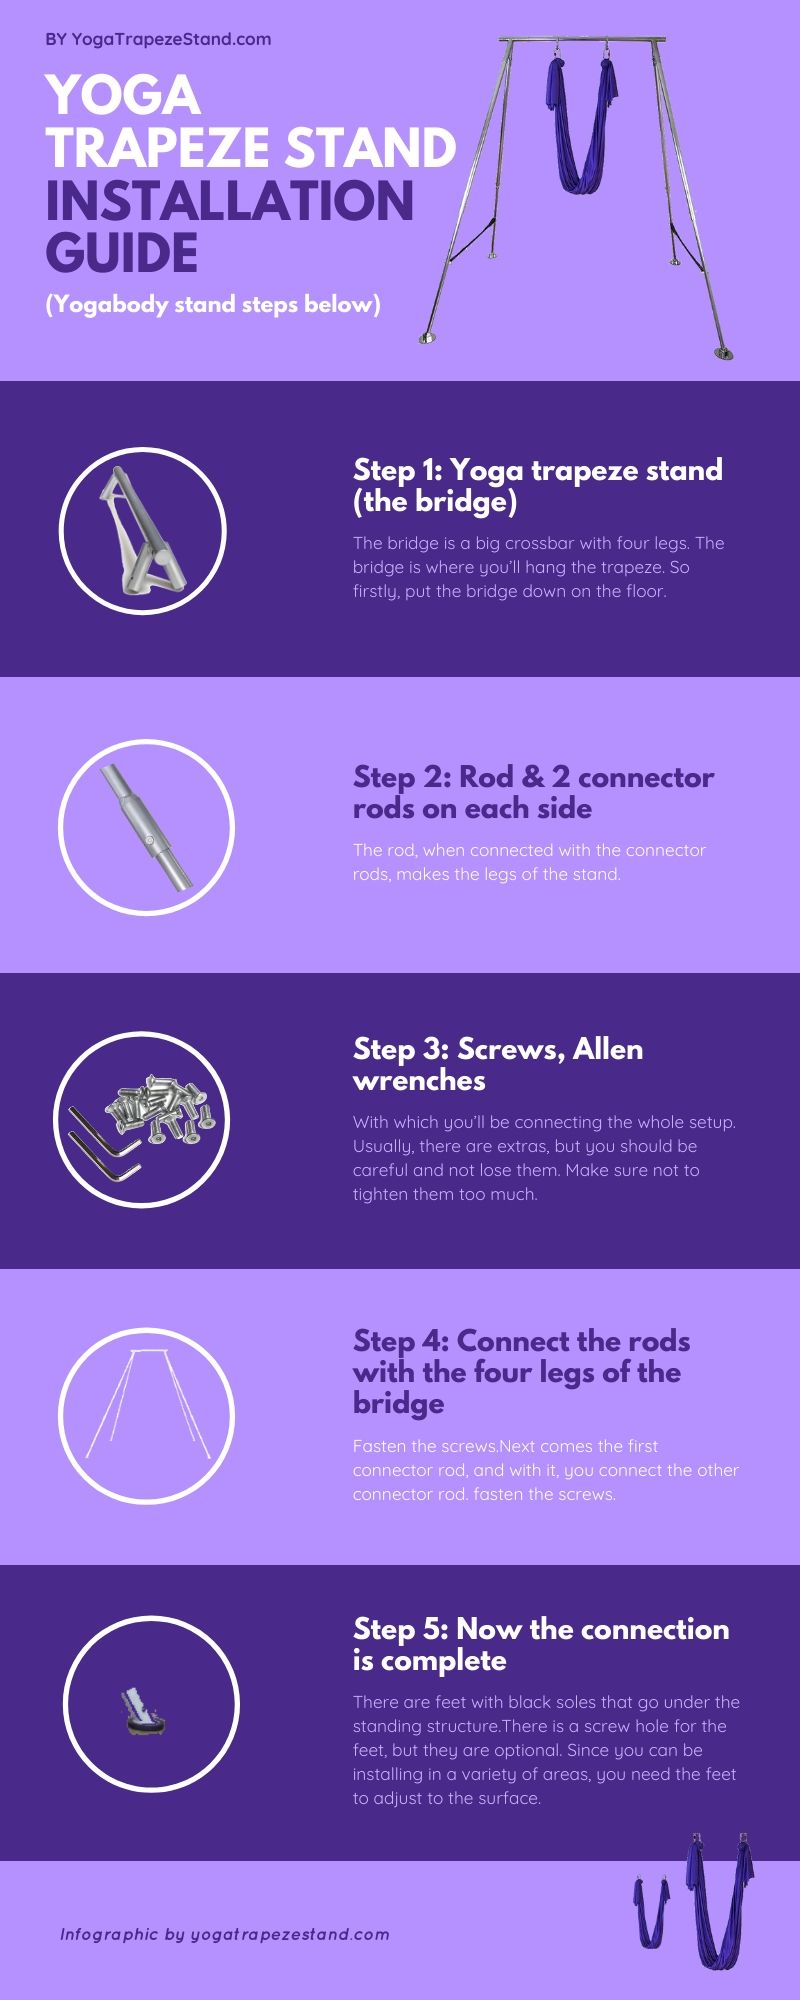
- You begin with the top of your Yoga trapeze stand which is called the bridge. The bridge is a big crossbar with four legs. The bridge is where you’ll hang the trapeze. So firstly, put the bridge down on the floor.
- Notice that there is a rod, and two connector rods on each side. The rod, when connected with the connector rods, makes the legs of the stand. ‘
- There are screws and Allen wrenches with your stand setup, with which you’ll be connecting the whole setup. Usually there are extras, but you should careful and not lose them.
- While you’re tightening the screws, make sure not to tighten them too much.
- First, you connect the rods with the four legs of the bridge. Fasten the screws.
- Next comes the first connector rod, and with it, you connect the other connector rod. fasten the screws.
- Now the connection is complete. There are feet with black soles that go under the standing structure.
- There are screw hole for the feet, but they are optional. Since you can be setting up in a variety of areas, you need the feet to adjust to the surface. It’s better to leave the screws out with this part of your stand. It is quite safe, so you don’t need to worry about it.
Here’s a video from Yogabody explaining the process. Have a look
So, hopefully you got enough idea from here to setup the trapeze stand on your own. It is a simple process really, and a fun one too. We wish you luck with your setup. Namaste!